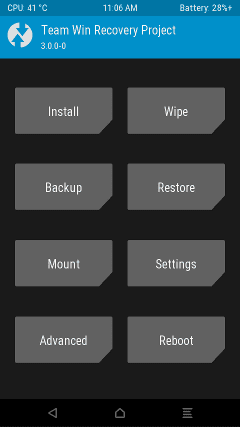
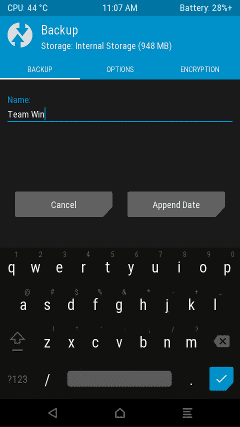
A few months ago, Samsung released their all new smartphone Galaxy S8 globally. As always, there are two variants of the smartphone. One comes with Samsung’s Exynos processor, and the other one comes with Snapdragon processors. Now in this guide, we are talking about the steps required to unlock the bootloader to Install TWRP custom recovery in Galaxy S8 Exynos devices.
Since Galaxy S8 is a trending smartphone, most of the developers are experimenting with it for providing great custom ROMs, features, improvements and root access. So this guide will be useful for trying them out. Please follow everything safely and be sure about what you are going to do.
Android Hits and the author of this article are not responsible for any damages caused by this.
How to Install TWRP custom recovery in Galaxy S8:
- In your ROM, go to Settings -> About device. Tap seven times on Build number to enable Developer options.
Go to Settings -> Developer options and enable OEM Unlock option. - Download and Install Samsung Mobile Phones Drivers.
– Option 1: Download and Install Smart Switch for PC.
– Option 2: Download and Install standalone driver package. - Download and extract Odin (Samsung’s Flash Tool) to your computer.
- Download a .tar image of TWRP.
- Reboot your device to download mode. – Hold [VOLUME DOWN] + [BIXBY] + [POWER] for approx. 15 seconds.
– Read the warning carefully.
– If you agree, press [VOLUME UP] to get into Download mode. If you don’t agree, STOP. - Open Odin and place that TWRP tar file in the [AP] slot.
- Connect your phone.
- Hold [VOLUME UP] + [BIXBY] + [POWER] on your phone and then press start on Odin.
- Wait for the phone to reboot. DO NOT release [VOLUME UP] + [BIXBY] + [POWER] or you may not reboot into TWRP.
HOW-TO INITIALIZE TWRP: (for new phones)
- If you completed Part 1 successfully, you should be in TWRP now. At this point, you will reach the screen asking you if you want to allow system modifications.
- Select “Keep /system RO”. (Don’t swipe right or you may not be able to boot into the system if you failed to complete next steps. However, you can swipe right to allow modifications if you are confident that you can complete next steps.)
- Go to “Wipe” menu of TWRP, and you will find “Format Data”. Press “Format Data” and type “yes” to continue.
- Go to “Reboot” menu and Press “Recovery” to reboot TWRP.
- Download the latest dm-verity and force encryption disabler zip on your computer.
- Transfer the zip to your phone.
- Option 1: MTP: Connect your phone to the computer and just copy the zip to internal storage. (similar to how you transfer files when in the system.)
- Option 2: ADB: Connect your phone with computer and run command “adb push /path/to/zip /sdcard/”.
- Option 3: External SD: Copy the zip to an external SD and then insert the card into your phone.
- Go to “Install” menu of TWRP and flash the zip.
TWRP is initialized and fully functional at this stage. Now you can either reboot into system or root, flash custom ROMs via TWRP.
Important notes:
- DON’T FORGET TO ENABLE “OEM UNLOCK” (located in Developers Options).
2. Your warranty may be voided. However, this may not affect you if your country forces Samsung to provide hardware warranty regardless of software status. - Samsung Firmware OTA will no longer work once you flashed custom binaries.
(You can flash custom ROMs if you want to keep the OS up-to-date.)
Now you have successfully installed the TWRP on your Samsung galaxy s8. The device is now ready to boot into TWRP custom recovery. Please let us know if you are facing any issues during the process.
Disclaimer: This article “How to Install TWRP custom recovery in Galaxy S8” is based on the inputs from the XDA forum.


